Technical Overview
High-Performance Brass Flare Connections
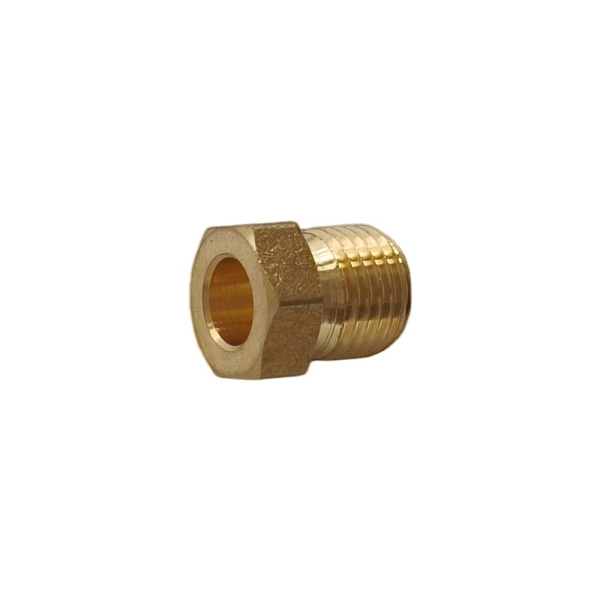
SAE 45° flare fittings provide a reliable, leak-free mechanical joint widely used across plumbing, gas, HVAC/R, and industrial applications. This vibration-resistant connection requires the copper, brass, aluminum, or steel bundy tubing to be flared into a bell shape, which is then securely clamped between the flare nut and the premium brass body. Serving as an excellent flame-free alternative to traditional welding or brazing, it eliminates job site safety hazards by requiring absolutely no heat during installation.
Versatile Market Applications & Media
Engineered for mid-to-high level vibration environments, these versatile fittings are ideal for heavy-duty trucks, mobile equipment, and factory automation. They efficiently handle critical media including propane, LPG (automotive, domestic, and commercial), natural gas, automotive fuels, vehicle brake lines, specialized refrigerant lines, industrial hydraulics, high-pressure pneumatics, and non-potable water lines. This wide compatibility makes them a trusted adapter choice for fluid power, cooling, and utility plumbing sectors.
Robust Technical Specifications
Designed to deliver exceptional durability and strength, the assembly withstands robust working pressures ranging from 0 to 17,250 kPa (2500 PSI) depending on tube size. The heavy-duty brass construction ensures long-lasting corrosion resistance in harsh conditions. For seamless system connectivity, these flare assemblies support multiple industrial pipe thread configurations, offering both NPT (National Pipe Tapered) threads and BSP options.
| Connection Type |
Flare |
| Fitting Shape |
Components & Spare Parts |
| Material |
Brass |
| Finish |
Natural |
| Working Pressure |
Depending on the size of tubing |
| Temp Range |
-65˚ to +250˚ F (-54° to 121° C) |
| Media |
Air, Water, Gas |
| Compatible Tubing |
Copper / Brass / Aluminum |
Markets & Applications
Target Markets:
HVAC & Refrigeration: Commercial cooling, air conditioning, and heating systems.
Automotive & Transportation: Heavy-duty truck manufacturing, mobile equipment, and fleet maintenance.
Industrial & Manufacturing: Factory automation, machinery, fluid power, and pneumatic systems.
Plumbing & Energy Sectors: Residential, commercial, and industrial gas and utility plumbing.Supported Applications & Media
Supported Applications & Media
Gas & Fuel Systems: Propane (LPG) lines, natural gas delivery, automotive fuels, and vehicle brake lines.
Cooling & Fluid Lines: Specialized refrigerant lines, industrial hydraulics, and high-pressure pneumatics.
System Connectivity: Multi-size brass adapters and tube assemblies for transitioning system connections.
Water Services: Non-drinking (non-potable) water distribution and utility lines.
Compliance
🟢 RoHS Compliance:
Fully compliant under EU Directive 2011/65/EU and its amendment (EU) 2015/863, utilizing Exemption 6(c) for copper alloys containing up to 4% lead by weight.
🟢 REACH Regulation (EC) No 1907/2006:
Contains Lead (CAS 7439-92-1), an SVHC substance under the REACH Candidate List, above 0.1% w/w. Information obligations under Article 33 have been fully fulfilled.
⚠️ California Proposition 65: WARNING:
This product can expose you to chemicals including Lead, which is known to the State of California to cause cancer and birth defects or other reproductive harm. For more information, go to www.P65Warnings.ca.gov
Assembly Instructions
1. Cut and Clean: Cut the tubing to the desired length. Ensure the ends are cut perfectly square and all burrs are removed.
2. Position Nut: Slide the nut onto the tube, ensuring the threaded end faces out toward the tube end.
3. Flare Tubing: Use a 45-degree flaring tool to flare the end of the tube.
•Check the flare diameter to ensure correct sizing.
•Inspect the flare to make sure the tube wall has not thinned out excessively.
•For thin-walled, welded, or brazed tubing, use a double flare to prevent cracking or pinching.
4. Lubricate and Hand-Tighten: Lubricate the threads, then assemble the nut onto the connector body. Turn the nut by hand until it is finger-tight.
5. Final Tightening: Tighten the assembly with a wrench until you feel solid resistance. From that point, turn the nut exactly one-sixth (1/6) of a turn further.
Note: Do not over-torque. Excessive tightening may damage the connectors or split the tubing at the flare